AppYourself Club AppYourself Club
  • NEWS
  • RESELLER CHECKLIST
  • SALES
  • SUPPORT
  • BLOG
  • NEWSLETTER
  • LIVE DEMO
  • MAKE A CALL: +49 30 – 60 98 19 795
  • Deutsch
  • English
AppYourself Club AppYourself Club
  • NEWS
  • RESELLER CHECKLIST
  • SALES
  • SUPPORT
  • BLOG
  • NEWSLETTER
  • LIVE DEMO
  • MAKE A CALL: +49 30 – 60 98 19 795
  • Deutsch
  • English
Jul 26

How to assign an app to a customer

  • July 26, 2018
  • No Comments

In just a few steps, you can assign an app to your customer

The first app is ready and the customer should receive his app? You must first assign the app to this customer. To do this, proceed as follows:

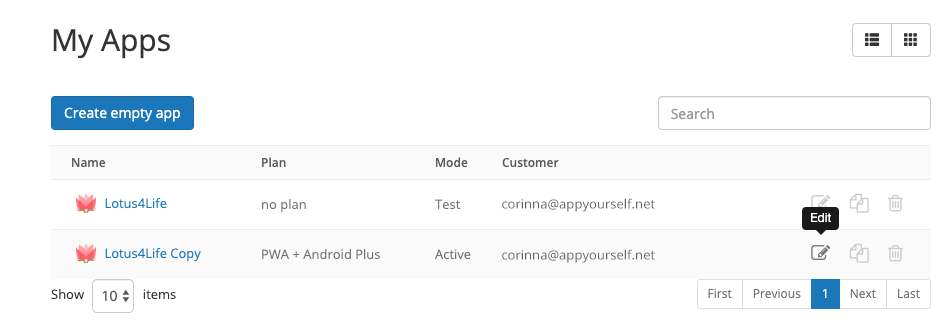
1. Go to the Reseller Center and call up the app overview under My Apps > All Apps (Select List View).
2. Select the app from the list and click on the edit icon (pen) to open the App properties.

Call up your app in the reseller center

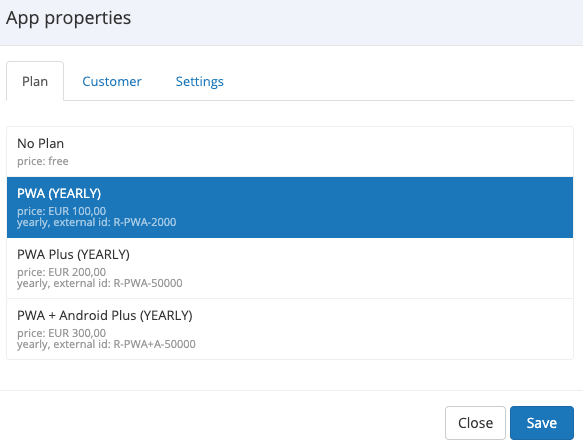
3. In the first tab Plan, select the appropriate app plan and click Save.

Choose your plan of the app you want to assign to your customer
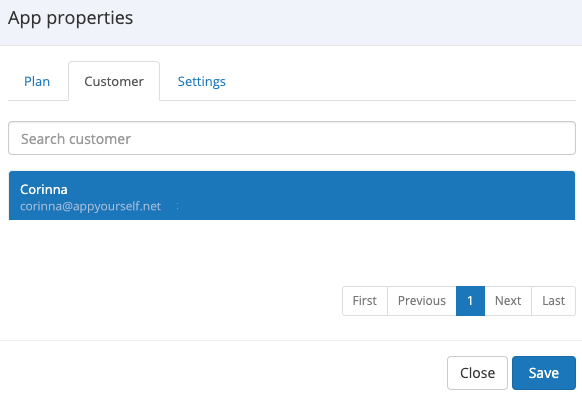
4. In the Customers tab, assign the plan to your customer and click also Save.

Assigning the plan to your customer
5. Then call up the app overview again, select the corresponding app and publish it under Edit > Publish > Publishing status by clicking the Publish Now button. The app is re-published, updated and you can present it to your customer.

757    App Maker  

Related Knowledge Base Posts -

  • The various settings for the app profile in detail
  • Activating the desktop version of your app
  • Integrating external content via iFrames
  • Facebook
  • Twitter
  • Tumblr
  • Pinterest
  • Google+
  • LinkedIn
  • E-Mail

About The Author

Leave a reply Cancel reply

You must be logged in to post a comment.

2015 Theme - WordPress Theme built by Mintithemes using WordPress.
  • Search Knowledgebase